
Your step-by-step guide to turning 2D pictures into 3D models using Paint 3D
The next update of Windows 10, the Fall Creators Update, will be available worldwide from October 17. As part of the update, Microsoft is evolving the photos experience to let people tell their story like never before using photos, videos, and 3D effects. There are also enhancements in gaming, security and accessibility.
There are also immersive new experiences made possible by Windows Mixed Reality. With Mixed Reality Viewer, you can see 3D objects – either from the Remix3D.com community or your own creation from Paint 3D – mixed into your actual surroundings through your PC’s camera. Here is a basic guide to turning your 2D pictures into 3D images:
STEP 1
Trace the outline of your drawing using the 3D Doodle tool
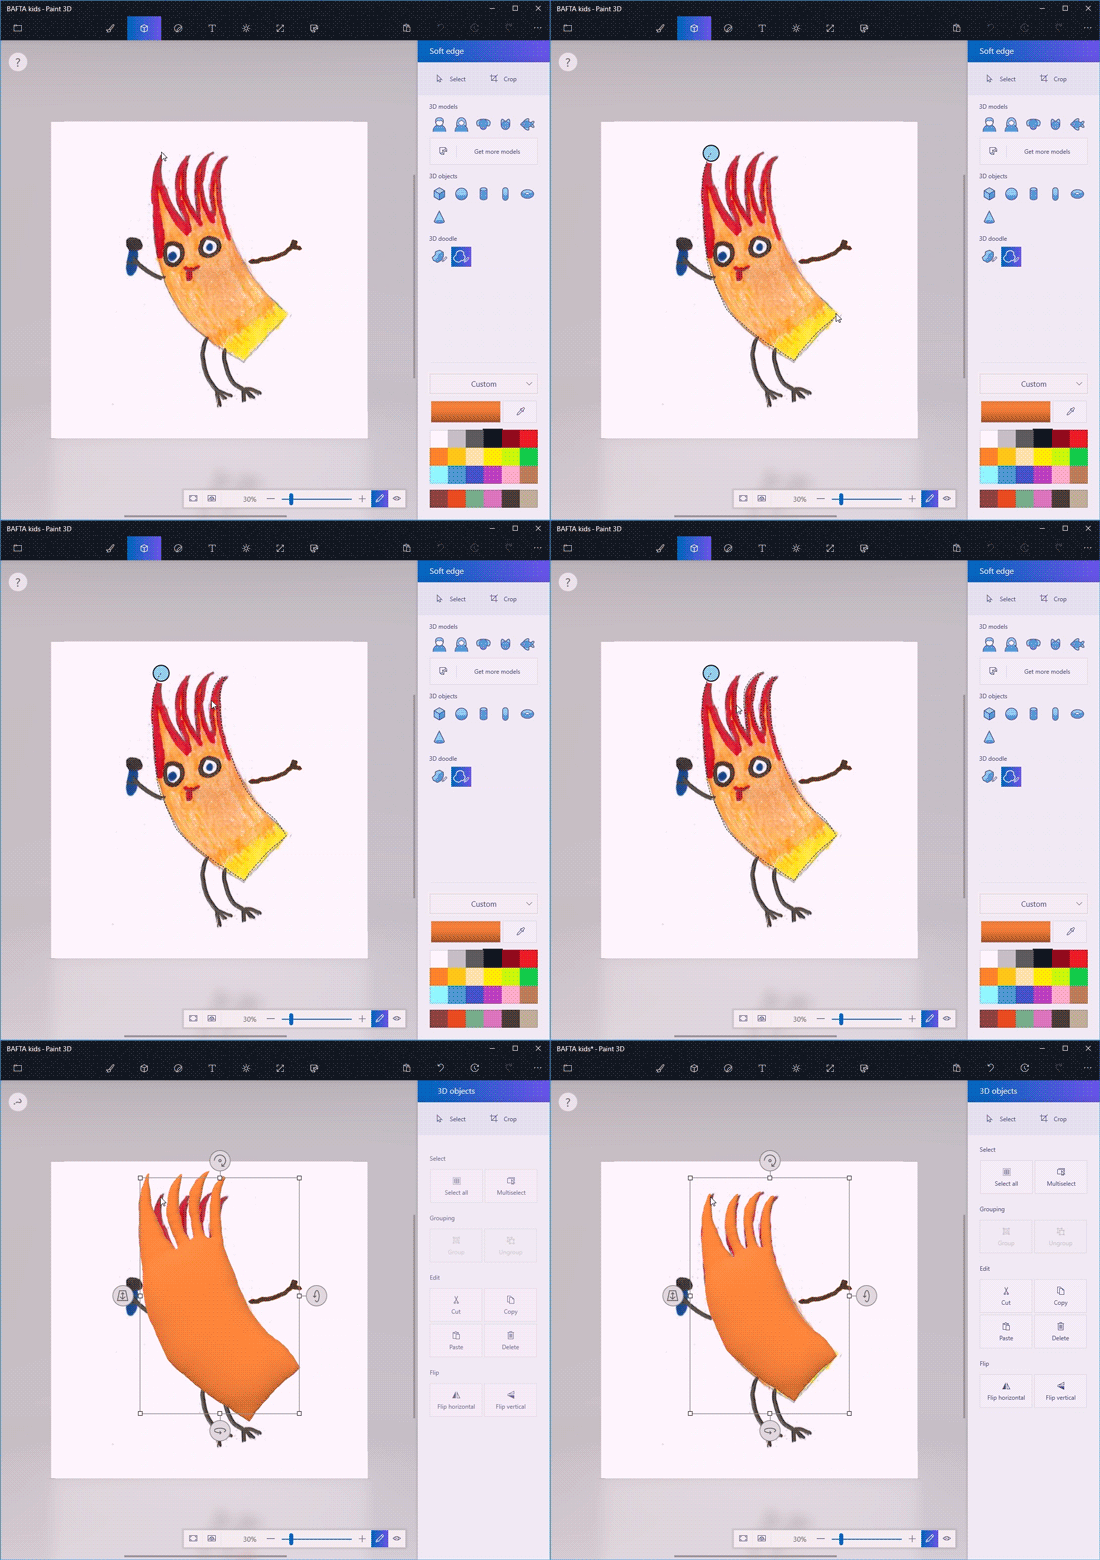
Advanced tip – Do a separate trace for each segment (eg arms, legs, tentacles etc) to give it more flexibility
STEP 2
Place all the pieces to make sure the are in the correct position, rotation and depth.
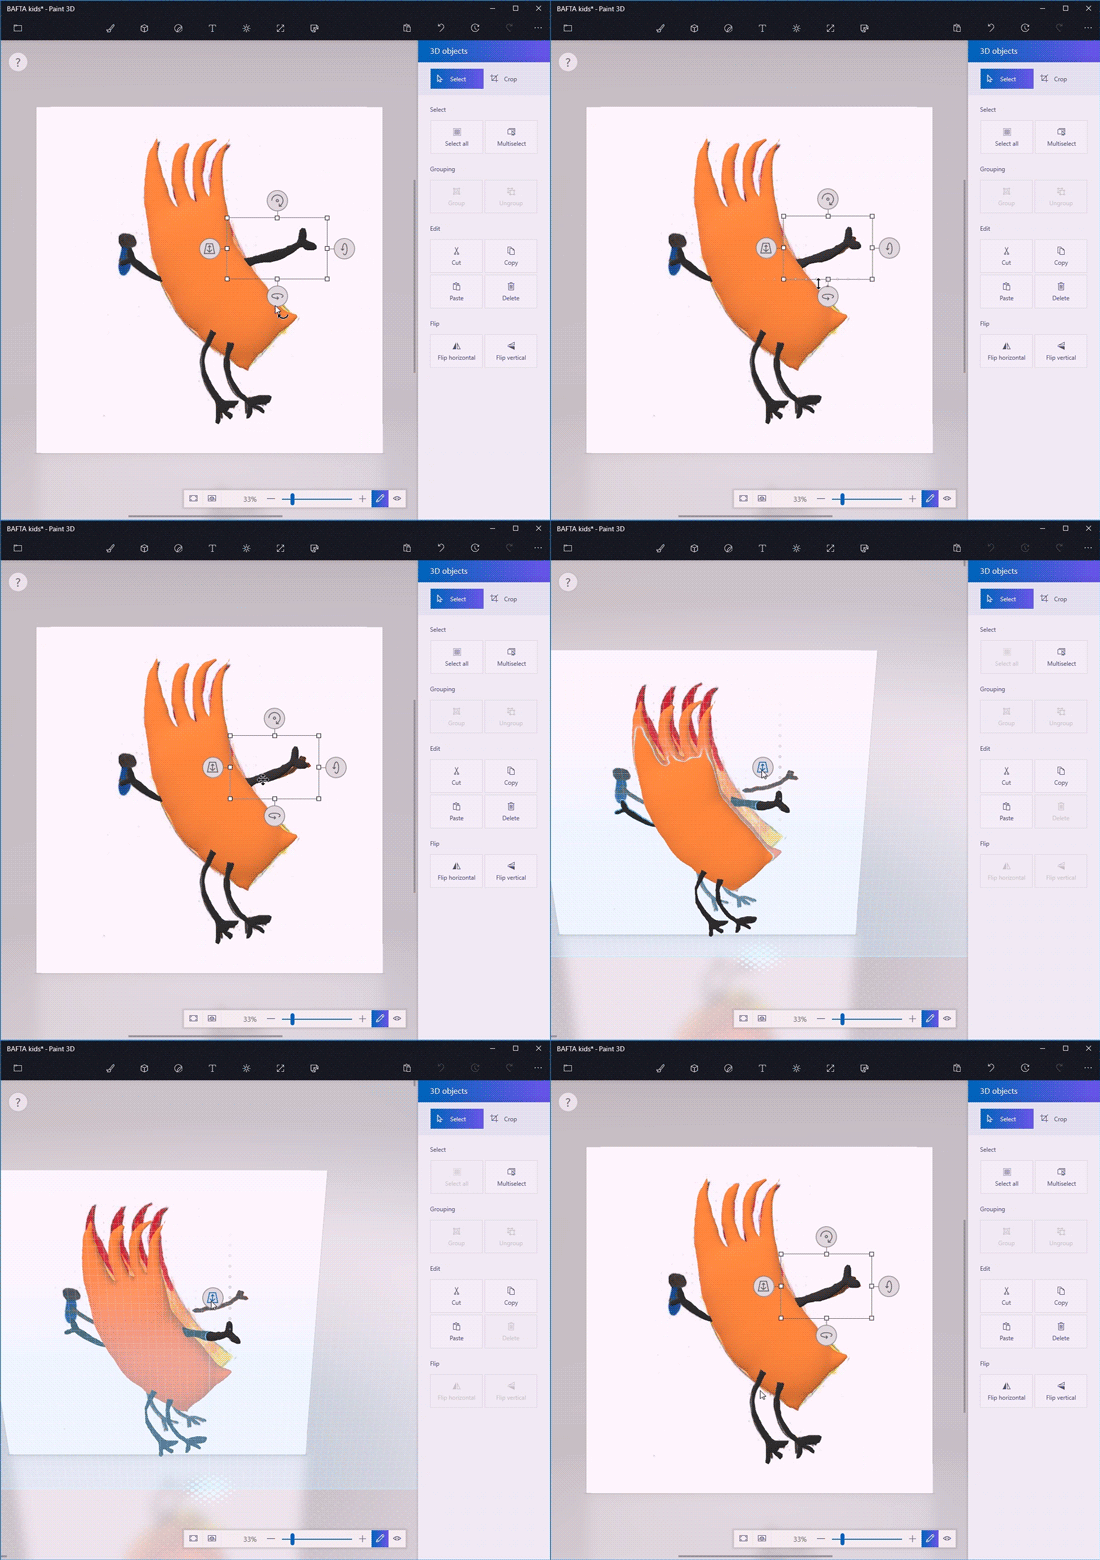
Advanced tip – use rotation to give more shape to your model rather than leaving everything flat
STEP 3
Colour in your model using the “Art Tools” exactly as you would in 2D
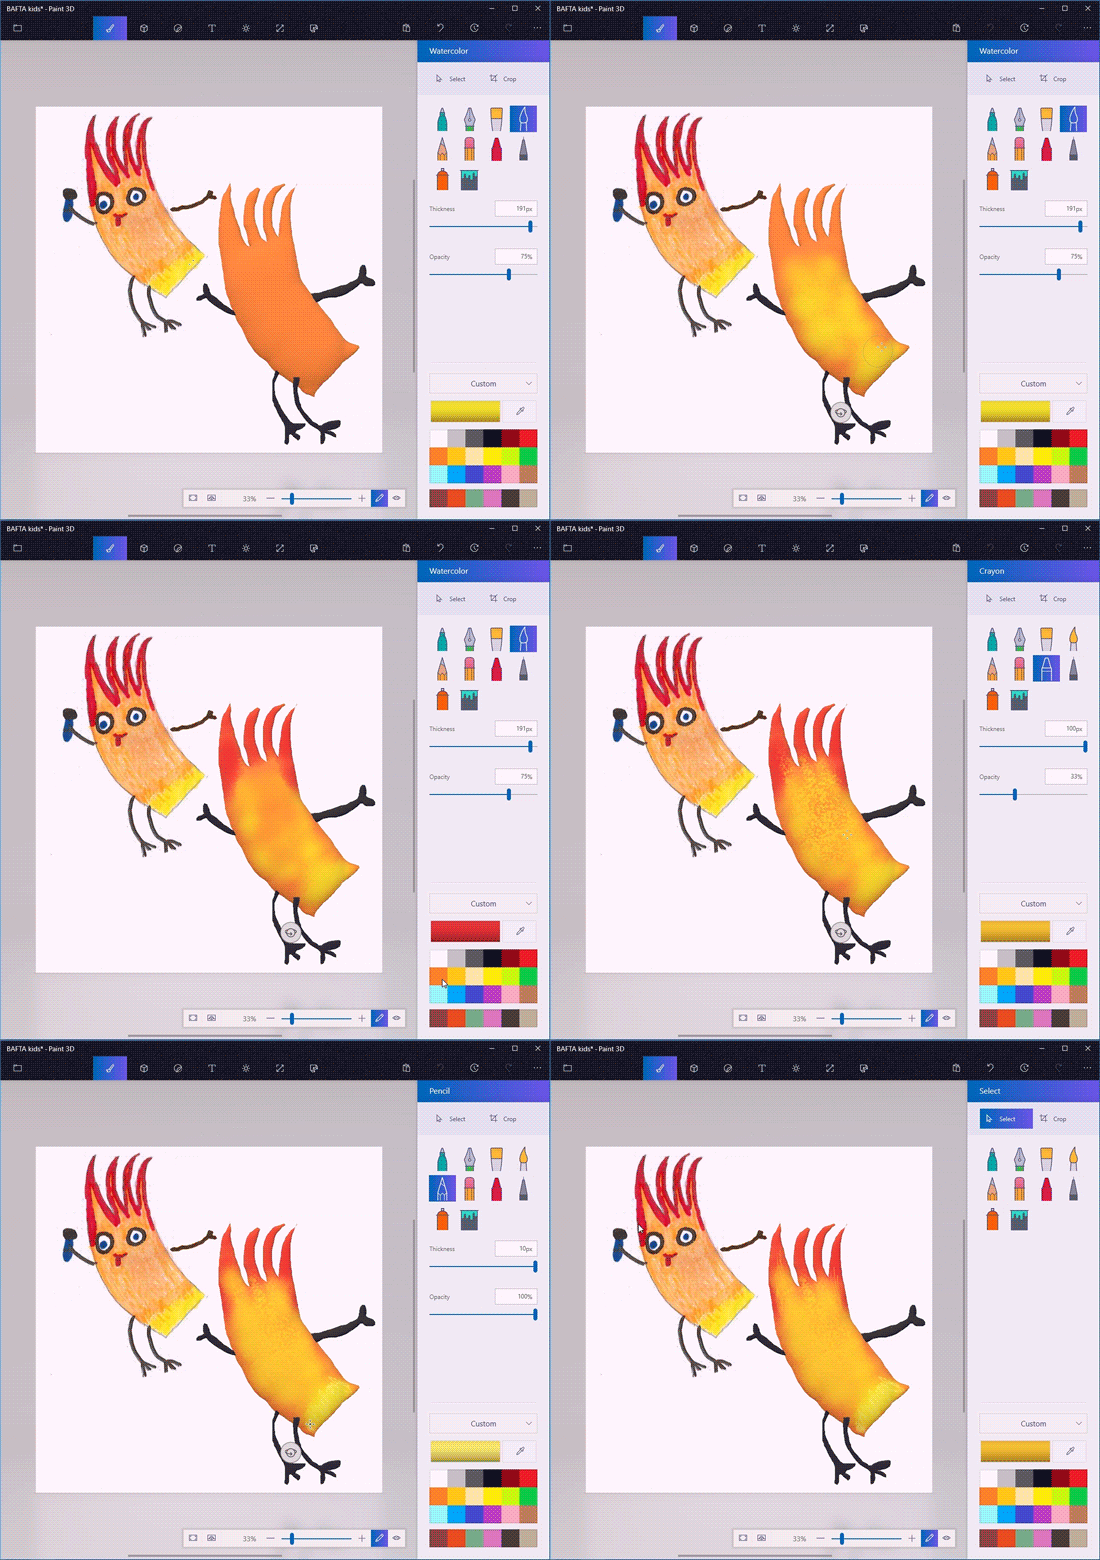
Advanced tip – Use the watercolor brush on a low opacity to blend colours together
STEP 4
Use “Magic Select” and “Stickers” to place parts of your 2D drawing onto your 3D model
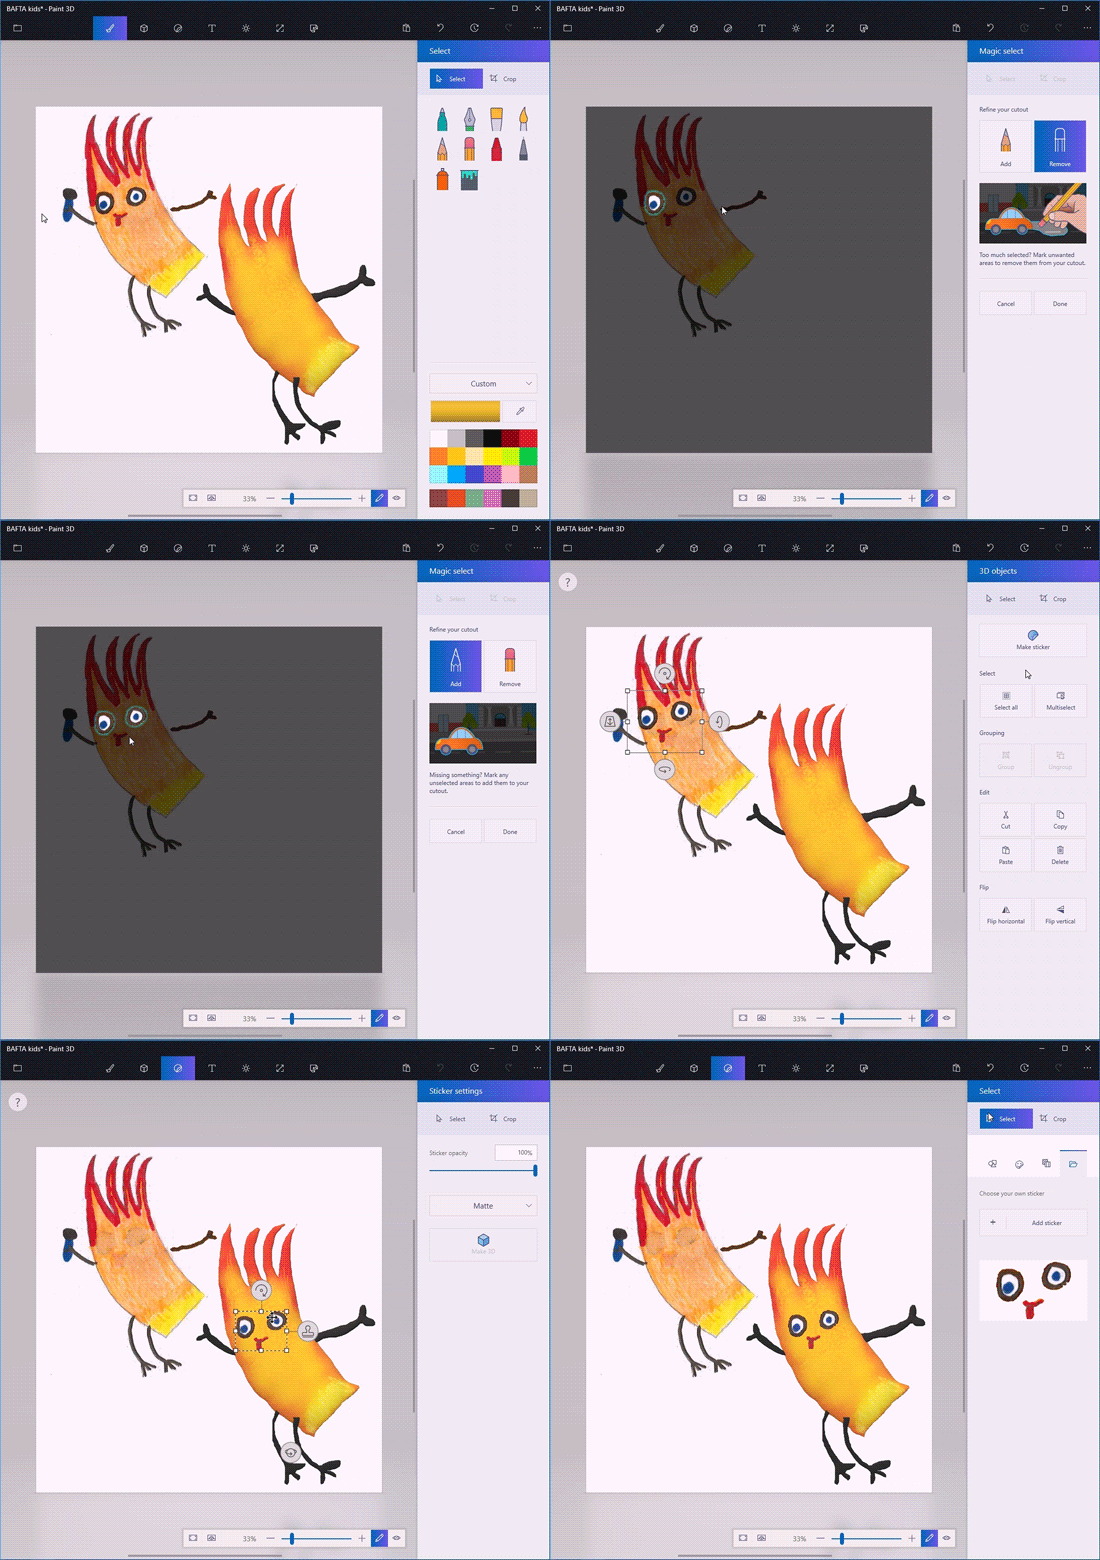
Advanced tip – Use the “Add” and “Remove” buttons to refine your selection
STEP 5
Search Remix3D for useful models from the community.
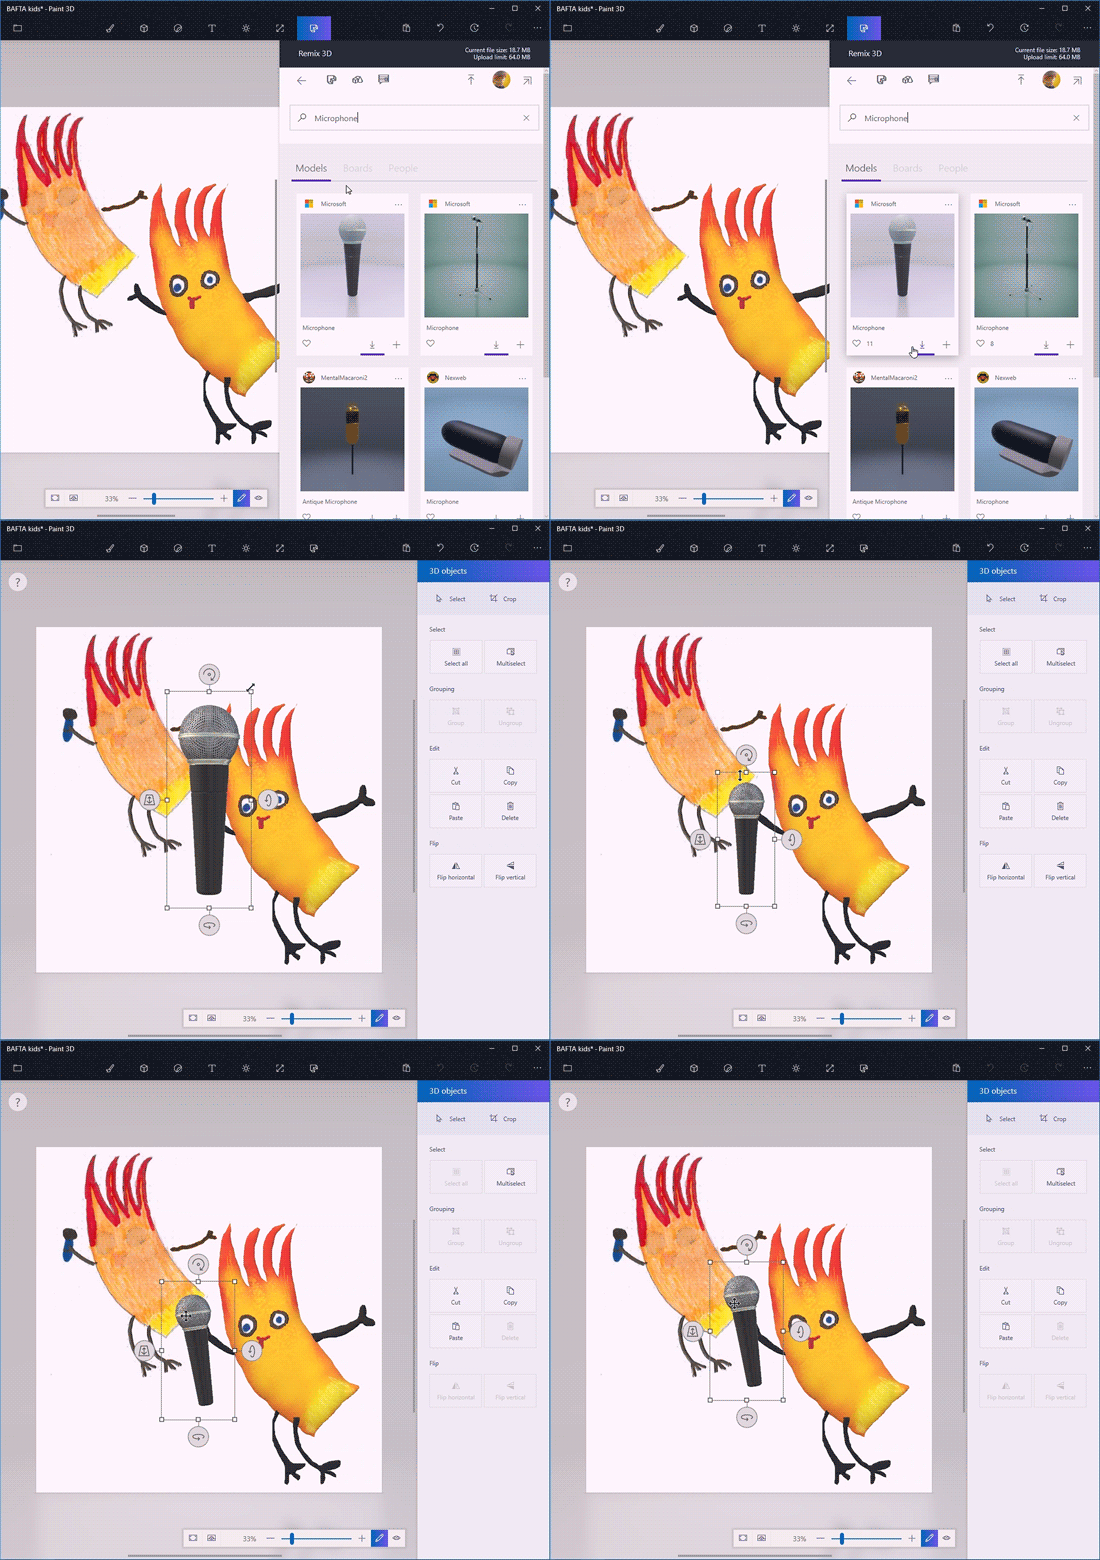
Advanced tip – Why not find some accessories for your model (hats, glasses, vehicles etc)
STEP 6
Share your glorious creation to Remix3D for the world to admire.
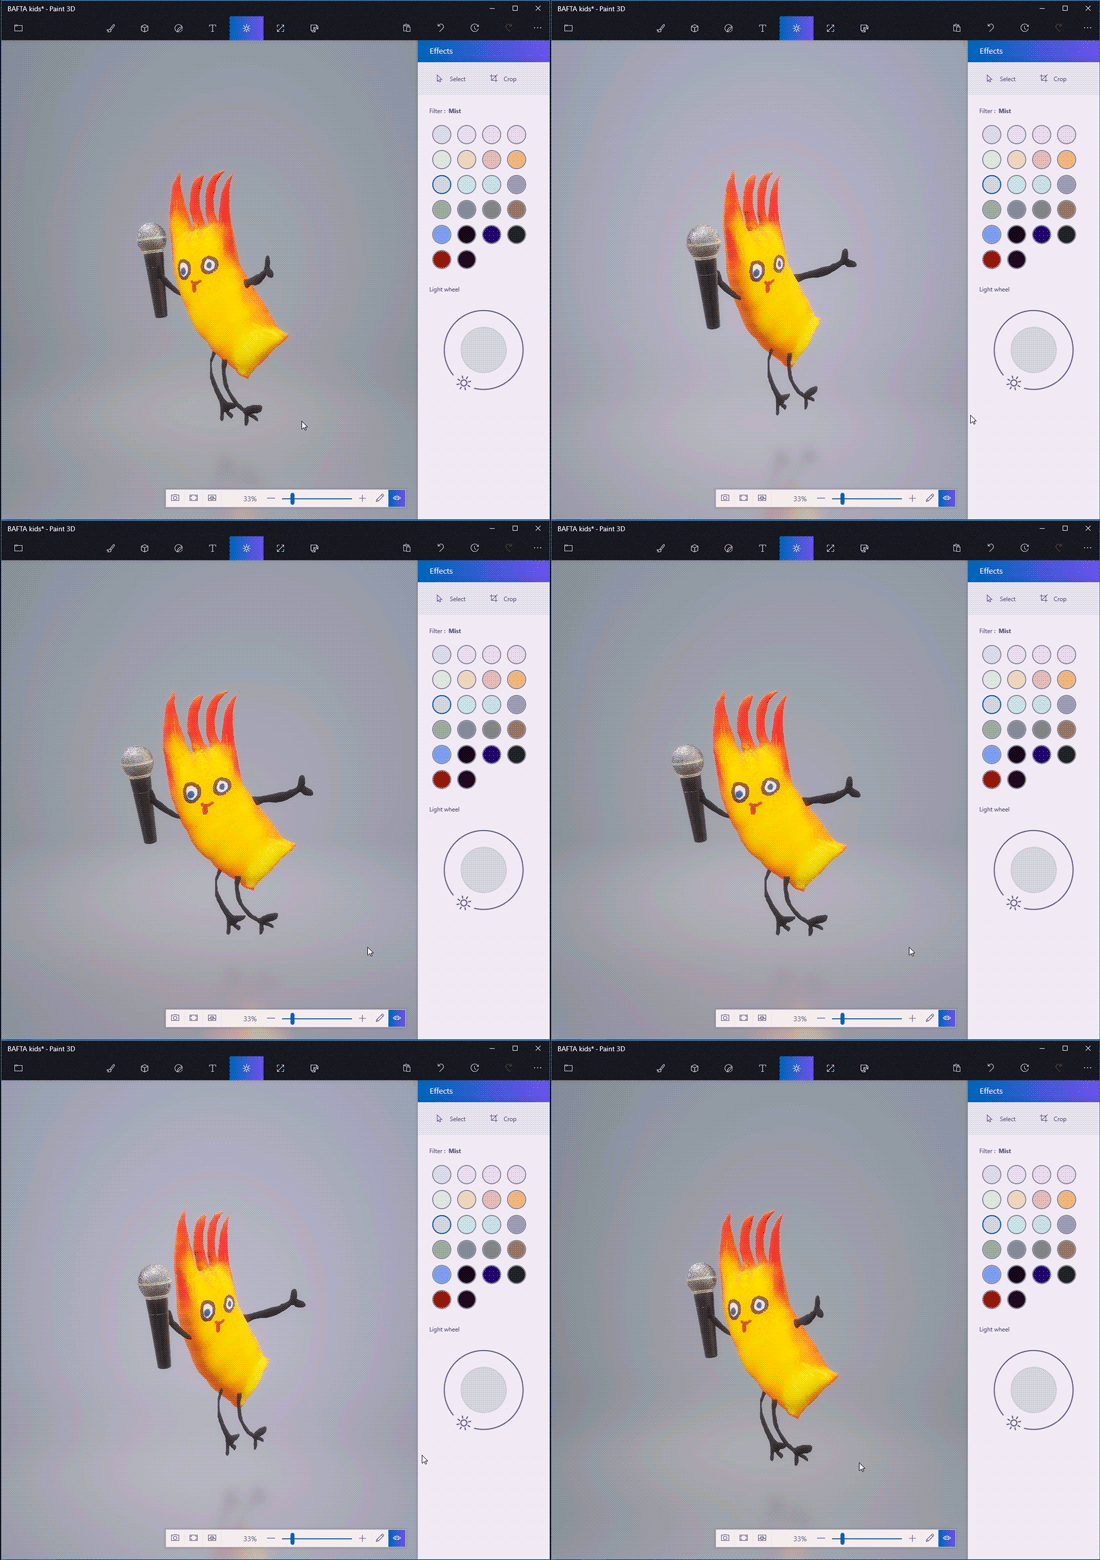
Advanced tip – Don’t forget to tag your model so others can find it easily

